> ## Documentation Index
> Fetch the complete documentation index at: https://private-7c7dfe99-detect-table-modification.mintlify.site/llms.txt
> Use this file to discover all available pages before exploring further.

> MongoDB を ClickHouse Cloud にシームレスに接続する方法を説明します。

# MongoDB から ClickHouse へのデータのインジェスト（CDC（変更データキャプチャ）を使用）

export const Image = ({img, alt, size = "lg", background}) => {
  const normalizedSize = ["sm", "md", "lg"].includes(size) ? size : "lg";
  const backgroundColor = background === "white" ? "white" : background === "black" ? "rgb(31 31 28)" : undefined;
  return <div className={`ch-image-${normalizedSize}`}>
      <Frame>
        <img src={img} alt={alt} style={{
    backgroundColor
  }} />
      </Frame>
    </div>;
};

export const BetaBadge = ({link, galaxyTrack, galaxyEvent}) => {
  if (link) {
    return <a href={link} target="_blank" rel="noopener noreferrer" className="betaBadge" onClick={galaxyTrack && galaxyEvent ? galaxyOnClick(galaxyEvent) : undefined}>
                <span>ベータ</span>
            </a>;
  }
  return <a href="https://clickhouse.com/docs/reference/settings/beta-and-experimental-features#beta-features" className="betaBadge">
            <span>ベータ機能</span>
        </a>;
};

<BetaBadge />

<Info>
  MongoDB から ClickHouse Cloud への ClickPipes を介したデータのインジェストは公開ベータです。
</Info>

<Note>
  ClickHouse Cloud コンソールとドキュメントでは、MongoDB について "table" と "collection" を同じ意味で使用しています。
</Note>

ClickPipes を使用すると、MongoDB データベースから ClickHouse Cloud にデータを取り込めます。ソースとなる MongoDB データベースは、オンプレミスでホストすることも、MongoDB Atlas などのサービスを使ってクラウドでホストすることもできます。

MongoDB ClickPipes は、ClickPipes UI を使用して手動でデプロイおよび管理できるほか、[OpenAPI](/ja/integrations/clickpipes/programmatic-access/openapi) や [Terraform](/ja/integrations/clickpipes/programmatic-access/terraform) を使用してプログラムでデプロイおよび管理することもできます。

<div id="prerequisites">
  ## 前提条件
</div>

開始するには、まず MongoDB データベースがレプリケーション用に正しく構成されていることを確認する必要があります。構成手順は MongoDB のデプロイ方法によって異なるため、以下の該当するガイドに従ってください。

1. [MongoDB Atlas](/ja/integrations/clickpipes/mongodb/source/atlas)

2. [Generic MongoDB](/ja/integrations/clickpipes/mongodb/source/generic)

3. [Amazon DocumentDB](/ja/integrations/clickpipes/mongodb/source/documentdb)

ソースの MongoDB データベースの設定が完了したら、ClickPipe の作成に進むことができます。

<div id="create-your-clickpipe">
  ## ClickPipe を作成する
</div>

ClickHouse Cloud アカウントにログインしていることを確認してください。まだアカウントをお持ちでない場合は、[こちら](https://cloud.clickhouse.com/)から登録できます。

1. ClickHouse Cloud コンソールで、ClickHouse Cloud サービスに移動します。

<Image img="https://mintcdn.com/private-7c7dfe99-detect-table-modification/Qdrmbc1T54ihl0_n/images/integrations/data-ingestion/clickpipes/cp_service.webp?fit=max&auto=format&n=Qdrmbc1T54ihl0_n&q=85&s=baa2a1fbd12dce262df262176b152c5f" alt="ClickPipes サービス" size="lg" border width="1184" height="482" data-path="images/integrations/data-ingestion/clickpipes/cp_service.webp" />

2. 左側のメニューで `Data Sources` を選択し、「Set up a ClickPipe」をクリックします。

<Image img="https://mintcdn.com/private-7c7dfe99-detect-table-modification/Qdrmbc1T54ihl0_n/images/integrations/data-ingestion/clickpipes/cp_step0.webp?fit=max&auto=format&n=Qdrmbc1T54ihl0_n&q=85&s=5c127cc5de6fe7160371dce223f06b60" alt="インポートを選択" size="lg" border width="2606" height="790" data-path="images/integrations/data-ingestion/clickpipes/cp_step0.webp" />

3. `MongoDB CDC` タイルを選択します。

<Image img="https://mintcdn.com/private-7c7dfe99-detect-table-modification/Qdrmbc1T54ihl0_n/images/integrations/data-ingestion/clickpipes/mongodb/mongodb-tile.webp?fit=max&auto=format&n=Qdrmbc1T54ihl0_n&q=85&s=7cc51a48c41566a3d72bf0d6343c28e1" alt="MongoDB を選択" size="lg" border width="1802" height="986" data-path="images/integrations/data-ingestion/clickpipes/mongodb/mongodb-tile.webp" />

<div id="add-your-source-mongodb-database-connection">
  ### ソースの MongoDB データベース接続を追加する
</div>

4. 前提条件の手順で設定したソースの MongoDB データベースの接続情報を入力します。

<Info>
  接続情報の入力を始める前に、ファイアウォールのルールで ClickPipes の IP アドレスを許可リストに追加していることを確認してください。次のページで、[ClickPipes の IP アドレス一覧](/ja/integrations/clickpipes/networking/static-ips)を確認できます。
  詳しくは、[このページ上部](#prerequisites)にリンクされているソース MongoDB のセットアップガイドを参照してください。
</Info>

<Image img="https://mintcdn.com/private-7c7dfe99-detect-table-modification/Qdrmbc1T54ihl0_n/images/integrations/data-ingestion/clickpipes/mongodb/mongodb-connection-details.webp?fit=max&auto=format&n=Qdrmbc1T54ihl0_n&q=85&s=a48eb97ccf97e7ef1fd5fd8e25c79fc5" alt="接続情報を入力" size="lg" border width="1538" height="1698" data-path="images/integrations/data-ingestion/clickpipes/mongodb/mongodb-connection-details.webp" />

<div id="optional-changing-tls-settings">
  #### &#x20;(任意) TLS設定の変更
</div>

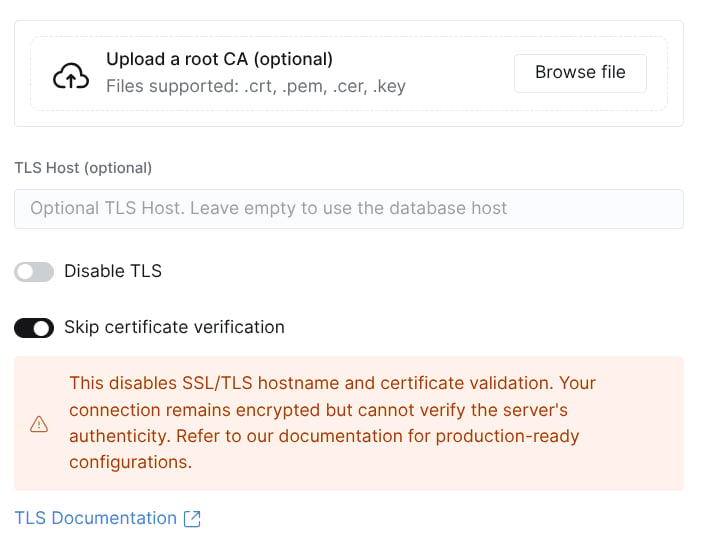
デフォルトでは、ClickPipe は TLS と証明書検証を有効にした状態で作成されます。これらのデフォルト設定は、ClickPipe の作成時に変更できます。
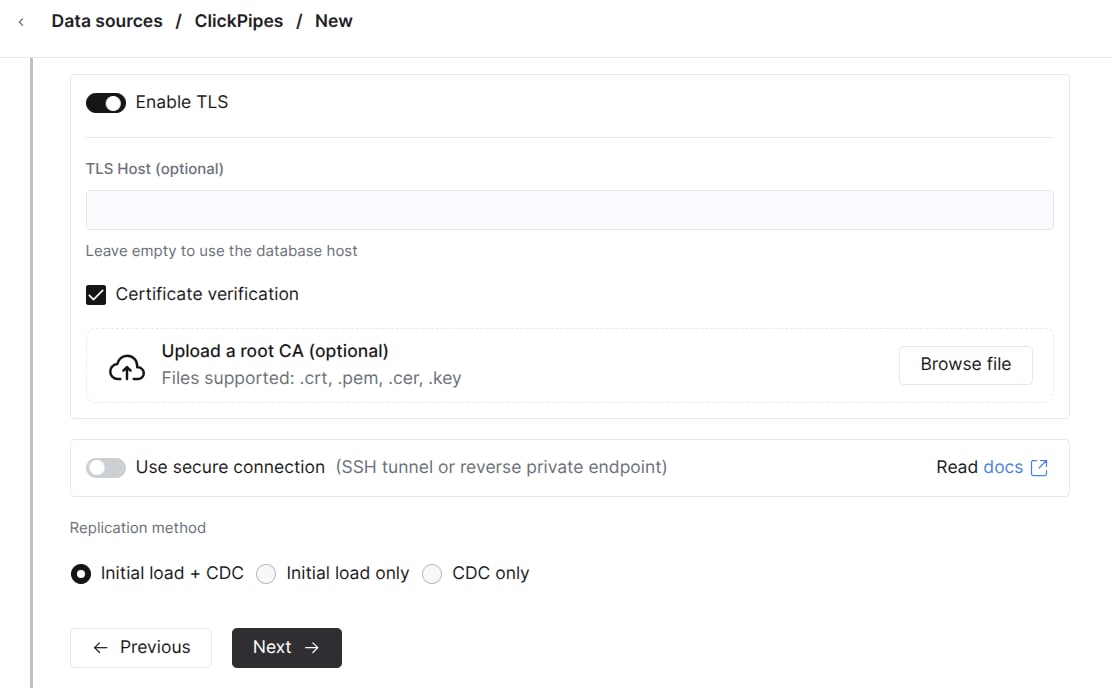
<Frame>
  <img src="https://mintcdn.com/private-7c7dfe99-detect-table-modification/nH26ELfEvmC8yX3w/images/integrations/data-ingestion/clickpipes/postgres/tls-settings.webp?fit=max&auto=format&n=nH26ELfEvmC8yX3w&q=85&s=62664fb24f0caec9623c53c6e53a7d3e" alt="TLS 設定" width="1113" height="688" data-path="images/integrations/data-ingestion/clickpipes/postgres/tls-settings.webp" />
</Frame>

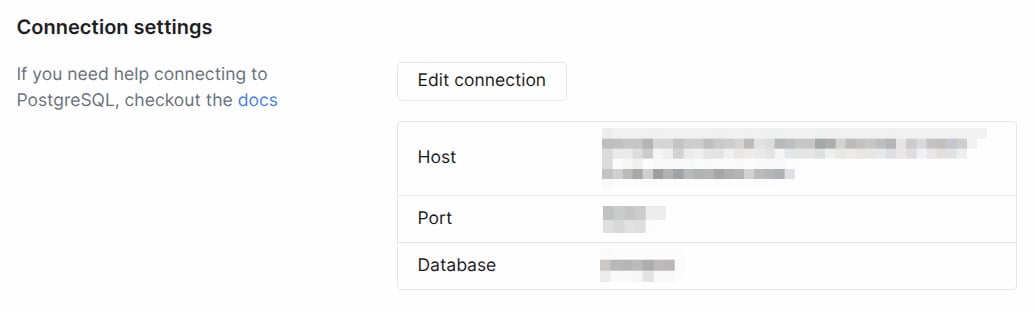
または、一時停止中の ClickPipe の *Settings* タブにある *Connection settings* セクションで編集することもできます。
<Frame>
  <img src="https://mintcdn.com/private-7c7dfe99-detect-table-modification/nH26ELfEvmC8yX3w/images/integrations/data-ingestion/clickpipes/postgres/pipe-connection-settings.webp?fit=max&auto=format&n=nH26ELfEvmC8yX3w&q=85&s=de54c0f0f33e54028d456565ddd9f38e" alt="接続設定 -> 接続を編集" data-og-width="1035" width="1035" data-og-height="312" height="312" data-path="images/integrations/data-ingestion/clickpipes/postgres/pipe-connection-settings.webp" data-optimize="true" data-opv="3" srcset="https://mintcdn.com/private-7c7dfe99-detect-table-modification/nH26ELfEvmC8yX3w/images/integrations/data-ingestion/clickpipes/postgres/pipe-connection-settings.webp?w=280&fit=max&auto=format&n=nH26ELfEvmC8yX3w&q=85&s=bf50f2f2d27d28ed6376a037832def53 280w, https://mintcdn.com/private-7c7dfe99-detect-table-modification/nH26ELfEvmC8yX3w/images/integrations/data-ingestion/clickpipes/postgres/pipe-connection-settings.webp?w=560&fit=max&auto=format&n=nH26ELfEvmC8yX3w&q=85&s=c9a97b7ababd7ca2dd5b149ce05b3f54 560w, https://mintcdn.com/private-7c7dfe99-detect-table-modification/nH26ELfEvmC8yX3w/images/integrations/data-ingestion/clickpipes/postgres/pipe-connection-settings.webp?w=840&fit=max&auto=format&n=nH26ELfEvmC8yX3w&q=85&s=556cb668edbbea4ae6426d7b7ced2cb4 840w, https://mintcdn.com/private-7c7dfe99-detect-table-modification/nH26ELfEvmC8yX3w/images/integrations/data-ingestion/clickpipes/postgres/pipe-connection-settings.webp?w=1100&fit=max&auto=format&n=nH26ELfEvmC8yX3w&q=85&s=1aecdf09094107d3e1c05f301893980f 1100w, https://mintcdn.com/private-7c7dfe99-detect-table-modification/nH26ELfEvmC8yX3w/images/integrations/data-ingestion/clickpipes/postgres/pipe-connection-settings.webp?w=1650&fit=max&auto=format&n=nH26ELfEvmC8yX3w&q=85&s=2e0d46ca653fd55039fd7e52ded03fd5 1650w, https://mintcdn.com/private-7c7dfe99-detect-table-modification/nH26ELfEvmC8yX3w/images/integrations/data-ingestion/clickpipes/postgres/pipe-connection-settings.webp?w=2500&fit=max&auto=format&n=nH26ELfEvmC8yX3w&q=85&s=4464254ea0d06bca3de90c1c025d028d 2500w" />
</Frame>

<Frame>
  <img src="https://mintcdn.com/private-7c7dfe99-detect-table-modification/nH26ELfEvmC8yX3w/images/integrations/data-ingestion/clickpipes/postgres/pipe-edit-connection.webp?fit=max&auto=format&n=nH26ELfEvmC8yX3w&q=85&s=31fde7110ac800ffc3d6dfa28e70b90d" alt="接続を編集" width="703" height="542" data-path="images/integrations/data-ingestion/clickpipes/postgres/pipe-edit-connection.webp" />
</Frame>

各項目の意味は次のとおりです。

* `Disable TLS` は、その接続で TLS を有効または無効にするトグルです。TLS を無効にすると、データはネットワーク上を平文で送信されるため、シークレットや機密データが含まれる可能性があります。
* `Skip certificate verification` は、ソースデータベースから提示される証明書の検証を有効または無効にするトグルです。証明書検証をスキップすることによるセキュリティ上の影響を考慮してください。
* `TLS Host` (省略可。デフォルトはソースの *Host*) は、証明書検証が有効な場合に、証明書の CN と一致している必要があるホスト名です。
* `Upload CA` は、証明書検証が有効な場合に使用する CA を指定するために利用できます。

<div id="optional-set-up-ssh-tunneling">
  #### &#x20;(任意) SSHトンネリングを設定する
</div>

ソースのMongoDBデータベースにパブリックアクセスできない場合は、SSHトンネリングの詳細を指定できます。

1. 「Use SSH Tunnelling」トグルを有効にします。

2. SSH接続の詳細を入力します。

   <Image img="https://mintcdn.com/private-7c7dfe99-detect-table-modification/nH26ELfEvmC8yX3w/images/integrations/data-ingestion/clickpipes/postgres/ssh-tunnel.jpg?fit=max&auto=format&n=nH26ELfEvmC8yX3w&q=85&s=7d9d503c2c5219501767251d83508405" alt="SSHトンネリング" size="lg" border width="1780" height="1342" data-path="images/integrations/data-ingestion/clickpipes/postgres/ssh-tunnel.jpg" />

3. 鍵ベースの認証を使用するには、「Revoke and generate key pair」をクリックして新しいキーペアを生成し、生成された公開鍵をSSHサーバーの`~/.ssh/authorized_keys`にコピーします。

4. 「Verify Connection」をクリックして、接続を確認します。

<Note>
  ClickPipesがSSHトンネルを確立できるように、SSH踏み台サーバーのファイアウォールルールで[ClickPipes の IP アドレス](/ja/integrations/clickpipes/networking/static-ips)を許可してください。
</Note>

接続の詳細を入力したら、`Next`をクリックします。

<div id="advanced-settings">
  #### 詳細設定を行う
</div>

必要に応じて詳細設定を行えます。各設定の概要は以下のとおりです。

* **Sync interval**: ClickPipes が変更を確認するためにソースデータベースをポーリングする間隔です。これは宛先の ClickHouse サービスのコストに影響するため、コストを重視する場合は高めの値 (`3600` 超) に設定することを推奨します。
* **Pull batch size**: 1 回のバッチで取得する行数です。これはベストエフォートの設定であり、常に適用されるとは限りません。
* **Snapshot number of tables in parallel**: 初回スナップショット時に並列に取得するテーブル数です。テーブル数が多い場合に、並列に取得するテーブル数を制御するのに役立ちます。

<div id="configure-the-tables">
  ### テーブルを設定する
</div>

5. ここでは、ClickPipe の宛先データベースを選択できます。既存のデータベースを選ぶことも、新しく作成することもできます。

   <Image img="https://mintcdn.com/private-7c7dfe99-detect-table-modification/Qdrmbc1T54ihl0_n/images/integrations/data-ingestion/clickpipes/mongodb/select-destination-db.webp?fit=max&auto=format&n=Qdrmbc1T54ihl0_n&q=85&s=e64cf1d16520a34f9a9baa186f15629b" alt="宛先データベースを選択" size="lg" border width="1742" height="548" data-path="images/integrations/data-ingestion/clickpipes/mongodb/select-destination-db.webp" />

6. コピー元の MongoDB データベースからレプリケートするテーブルを選択できます。テーブルの選択時には、宛先の ClickHouse データベースでテーブル名を変更することもできます。

<div id="review-permissions-and-start-the-clickpipe">
  ### 権限を確認して ClickPipe を開始する
</div>

7. 権限のドロップダウンで「Full access」ロールを選択し、「Complete Setup」をクリックします。

   <Image img="https://mintcdn.com/private-7c7dfe99-detect-table-modification/nH26ELfEvmC8yX3w/images/integrations/data-ingestion/clickpipes/postgres/ch-permissions.jpg?fit=max&auto=format&n=nH26ELfEvmC8yX3w&q=85&s=1bda0b1d071213c41a0a265322e0901b" alt="権限の確認" size="lg" border width="1844" height="716" data-path="images/integrations/data-ingestion/clickpipes/postgres/ch-permissions.jpg" />

<div id="whats-next">
  ## 次のステップ
</div>

MongoDB から ClickHouse Cloud にデータをレプリケートする ClickPipe の設定が完了したら、次は最適なパフォーマンスを得るために、データのクエリ方法やモデリングに注力できます。

<div id="caveats">
  ## 注意事項
</div>

このコネクタを使用する際は、以下の点にご注意ください。

* MongoDB バージョン 5.1.0 以降が必要です。
* CDC (変更データキャプチャ) には MongoDB のネイティブな変更ストリーム API を使用しており、リアルタイムの変更の取得には MongoDB の oplog を利用します。
* MongoDB のドキュメントは、デフォルトで JSON type として ClickHouse にレプリケートされます。これにより、スキーマを柔軟に管理できるほか、ClickHouse の豊富な JSON 演算子をクエリや分析に活用できます。JSON データのクエリについて詳しくは、[こちら](/ja/reference/data-types/newjson)をご覧ください。